
WORLD WAR II · NORTH AFRICA
El Alamein: Why the Breakthrough Took Twelve Days
In October 1942, the Eighth Army had more men, tanks, and supplies. It still had to get them through a defended belt of mines, guns, and counterattacking troops.
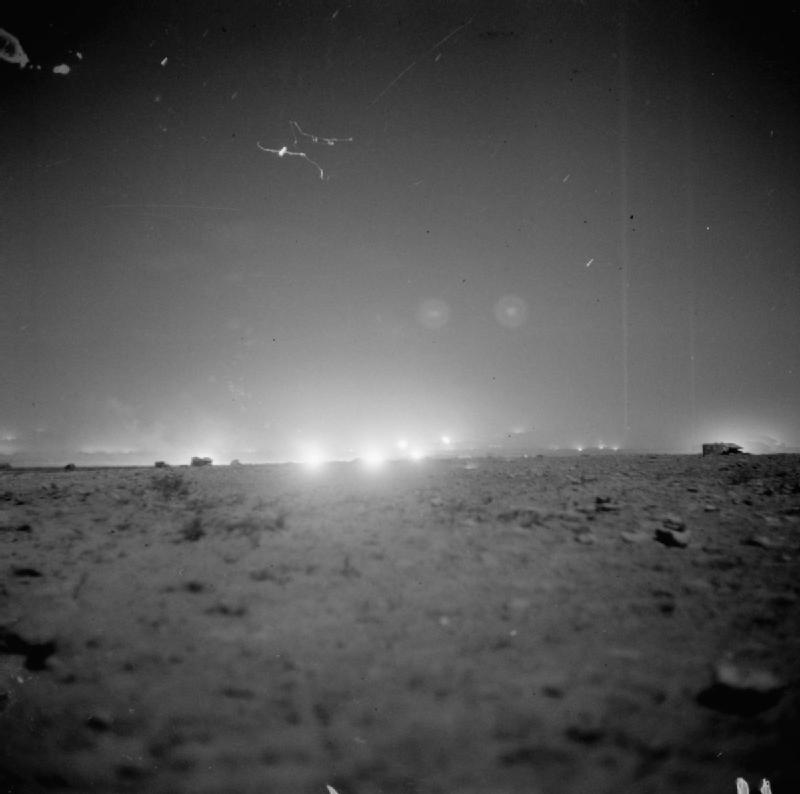
The artillery that opened the Second Battle of El Alamein on 23 October 1942 was meant to do more than batter the defenders. It had to support infantry moving through darkness toward positions that engineers would then help turn into corridors for tanks. The offensive depended on those different movements meeting at the right place and time. When the tanks failed to emerge as planned, the battle continued through another series of attacks, counterattacks, and reorganizations.
By 4 November, the German and Italian army was in retreat. Between those dates lay twelve days of fighting that resist the familiar picture of a single overwhelming blow delivered by Bernard Montgomery. The Eighth Army possessed major material advantages, but the defenders could concentrate fire on the few routes through their minefields. Numerical strength had to be brought across those bottlenecks before it could be used in the open.

The position that stopped the desert advance
The Alamein battles began months before Montgomery’s October offensive. After defeat at Gazala and the loss of Tobruk in June 1942, the Eighth Army withdrew into Egypt. General Claude Auchinleck organized resistance around El Alamein, where the Mediterranean to the north and the difficult ground of the Qattara Depression to the south restricted the space available for a wide armored turning movement.
The Australian War Memorial’s campaign record traces the first Axis attacks in July and the later attempt at Alam Halfa at the end of August. These were separate operations. The first prevented Erwin Rommel’s exhausted forces from continuing their advance into Egypt. The second failed after Montgomery had taken command of the Eighth Army. Holding the line through the summer created the conditions for the Allied offensive in October.
This geography also shaped the next attacker’s difficulties. The position that had helped protect Egypt became a fortified line that the Eighth Army would have to break. There was no convenient empty flank around which an armored force could simply drive. The army had to work through defended ground, and the German and Italian forces had used the pause to strengthen it.
Supply changed the balance before the shooting began
The coastal road connected armies to a small number of usable ports. An advance across the desert lengthened the distance trucks had to travel from their unloading points, consuming fuel, vehicle life, and time. Delivering more supplies to North Africa did not automatically put those supplies beside a tank near the front. Ships first had to arrive, cargo had to be unloaded, and transport had to complete the journey.
Craig Tibbitts’s Australian War Memorial study emphasizes this relationship between distance and port capacity. The Allied retreat brought the Eighth Army closer to its Egyptian supply bases; the Axis advance pulled Rommel farther from much of his supply infrastructure. Naval and air attacks on Axis shipping added another layer of uncertainty.
Supply therefore affected what commanders could attempt during the battle. Fuel shortages restricted movement and the ability to disengage. Ammunition shortages reduced the duration of defensive fire. A tank that could be repaired still needed recovery equipment, spare parts, and time. Attrition worked through this entire system. It was not simply a count of vehicles knocked out on one particular day.
Montgomery delayed the offensive while building up and training his force. The National Army Museum’s account describes an Eighth Army with more than 1,000 tanks and a substantial advantage in manpower and artillery. Published totals vary because authors use different dates and categories, but the direction of the imbalance is clear. The issue was how to turn that strength into a breach.
Minefields were part of a defended system
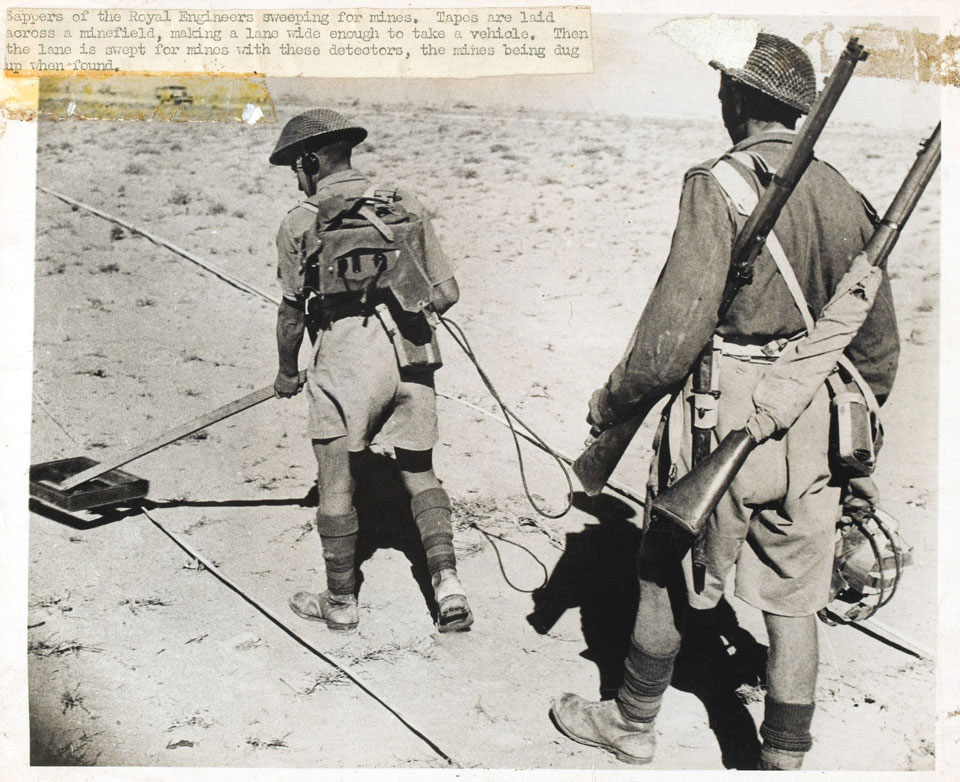
A minefield could damage a vehicle, force it to stop, or persuade it to use a route the defender already had under observation. Its military value depended on more than the explosive buried in the ground. Guns covering a clearance party could prevent engineers from finishing a lane; fire directed into a marked corridor could stop the vehicles trying to use it.
A contemporary U.S. military intelligence summary, “Enemy Minefields at El Alamein,” published in February 1943, describes belts with varying layouts, scattered mines, and positions covered by defensive fire. Its details were assembled from wartime reports and should not be read as a perfect map of every part of the front. They nevertheless show why mine clearance and the infantry battle could not be separated.
The attackers needed more than a narrow safe path for a few men. Tanks, guns, ambulances, and supply vehicles had to pass through and keep moving. A vehicle disabled in a corridor could obstruct those behind it. Darkness made movement harder to coordinate, while dawn exposed stalled formations to observation and aimed fire. Local delays could multiply as each part of the offensive waited for another to arrive.
Lightfoot and the problem of exploitation
Operation Lightfoot began on the night of 23 October with a major artillery preparation and infantry attacks. The main effort was in the north, with supporting operations farther south. Infantry formations were to gain positions within the Axis defenses while engineers opened routes for the armor. The intended sequence was a break-in followed by exploitation beyond the defended belts.
Many infantry units reached important objectives, but the armored advance did not develop as intended. The New Zealand Ministry for Culture and Heritage’s account identifies congestion, poor coordination, and cautious leadership among the causes. Its discussion is particularly useful because it links October to the painful experience of July. At Ruweisat Ridge and El Mreir, New Zealand infantry had taken ground but remained dangerously exposed when armored support did not arrive.
That earlier experience explains why a line on a map was an incomplete measure of progress. An infantry battalion could occupy its objective and still be unable to hold it against a counterattack. Success depended on bringing forward the weapons and supporting formations that made the position defensible. The same coordination problem could appear in both victory and defeat.
Nor did the offensive’s difficulties mean the preparation had been wasted. The Eighth Army could continue attacking, replace losses, and shift its main effort. Its material margin gave Montgomery alternatives after the first timetable broke down. German and Italian defenders had fewer opportunities to repair the damage while maintaining a continuous front.
The fighting near the coast drew in reserves
In the northern sector, the Australian 9th Division pressed toward the coast road and railway. These attacks threatened communications behind the defenders’ forward positions and helped draw German armor northward. Montgomery described this wearing-down process as “crumbling,” a term that can make a sequence of hard infantry battles sound more automatic than it was.
The Australians’ movements around Trig 29, the Fig Orchard, and the coastal positions forced repeated counterattacks. In Tibbitts’s account, battalions become progressively depleted and have to be relieved while the fighting continues. A formation might still appear on a headquarters map under its original name while containing far fewer men capable of another assault.
For the Axis command, moving reserves to one threatened sector could stabilize that local fight while weakening another. For the Allies, maintaining pressure in the north helped create room to prepare a renewed breakthrough attempt farther south. Neither process was cost-free. The men holding the diversion or pinning an enemy reserve faced real attacks, even if their role in the larger plan was to influence events elsewhere.
Supercharge reopened the attack
Operation Supercharge began in the early hours of 2 November. The experienced headquarters of the 2nd New Zealand Division directed a force reinforced by British infantry and armor. New Zealand’s official public-history account of the operation describes the aim as breaking through the defended zone and bringing the enemy’s armored force into a destructive engagement.
British infantry brigades advanced under artillery support; the 9th Armoured Brigade then fought through a costly attack against Axis guns. The armored breakthrough developed through continued fighting rather than an immediate open road. By this stage, losses and fuel shortages were severely restricting Rommel’s ability to restore the position.
Supercharge also makes national labels inadequate as an explanation of the battlefield. A New Zealand divisional headquarters could direct British brigades; Australian attacks could pull away forces that might otherwise oppose them; Indian, South African, and British formations had contributed to holding and attacking the Alamein line. The formations’ identities matter, but so do the attachments and supporting tasks that connected them.
Withdrawal, prisoners, and the next campaign
Rommel sought to withdraw as his position deteriorated. Hitler’s order to hold delayed the retreat, and on 4 November the Axis line finally broke. The Deutsches Historisches Museum’s overview places the defeat within the wider material imbalance and the long Axis supply route. The immediate consequences were uneven across the army: mobile formations could escape more readily than infantry without sufficient transport.
Thousands of German and Italian soldiers were taken prisoner. The fate of the Italian infantry cannot be explained by the familiar stereotype of unwilling soldiers. Units that had defended fixed positions could find themselves stranded when the transport and mobile troops needed to cover a withdrawal were unavailable. The collapse of a front changed the practical options of men who had been fighting on it.
The Eighth Army pursued west across Libya, but the war in North Africa continued. On 8 November, American and British forces landed in Morocco and Algeria in Operation Torch. Axis reinforcements entered Tunisia, where another campaign lasted until May 1943. Alamein had removed the immediate Axis threat to Egypt; Torch and the subsequent fighting confronted the surviving forces from the west as well as the east.
Sources and further reading
- National Army Museum: Second Battle of El Alamein.
- Australian War Memorial: Battles of El Alamein. Used for campaign sequence and the northern attacks; broad claims and aggregate casualty totals are not adopted here.
- Craig Tibbitts, Australian War Memorial: El Alamein 80 Years On, 2023.
- Manatū Taonga: El Alamein, North African Campaign.
- Manatū Taonga: 2 New Zealand Division Leads Breakthrough at El Alamein.
- U.S. War Department, Tactical and Technical Trends No. 19: Enemy Minefields at El Alamein, 25 February 1943, transcription hosted by Lone Sentry.
- Arnulf Scriba, Deutsches Historisches Museum: Die Schlacht bei El Alamein 1942.
- National Army Museum photographic record 2002-06-6-12.
Source note: “El Alamein” can refer to the July fighting, the wider summer–autumn campaign, or the offensive of 23 October–4 November. This article distinguishes those phases and avoids combining their casualty totals. Contemporary minefield reports describe observed practice, not every position on the front.